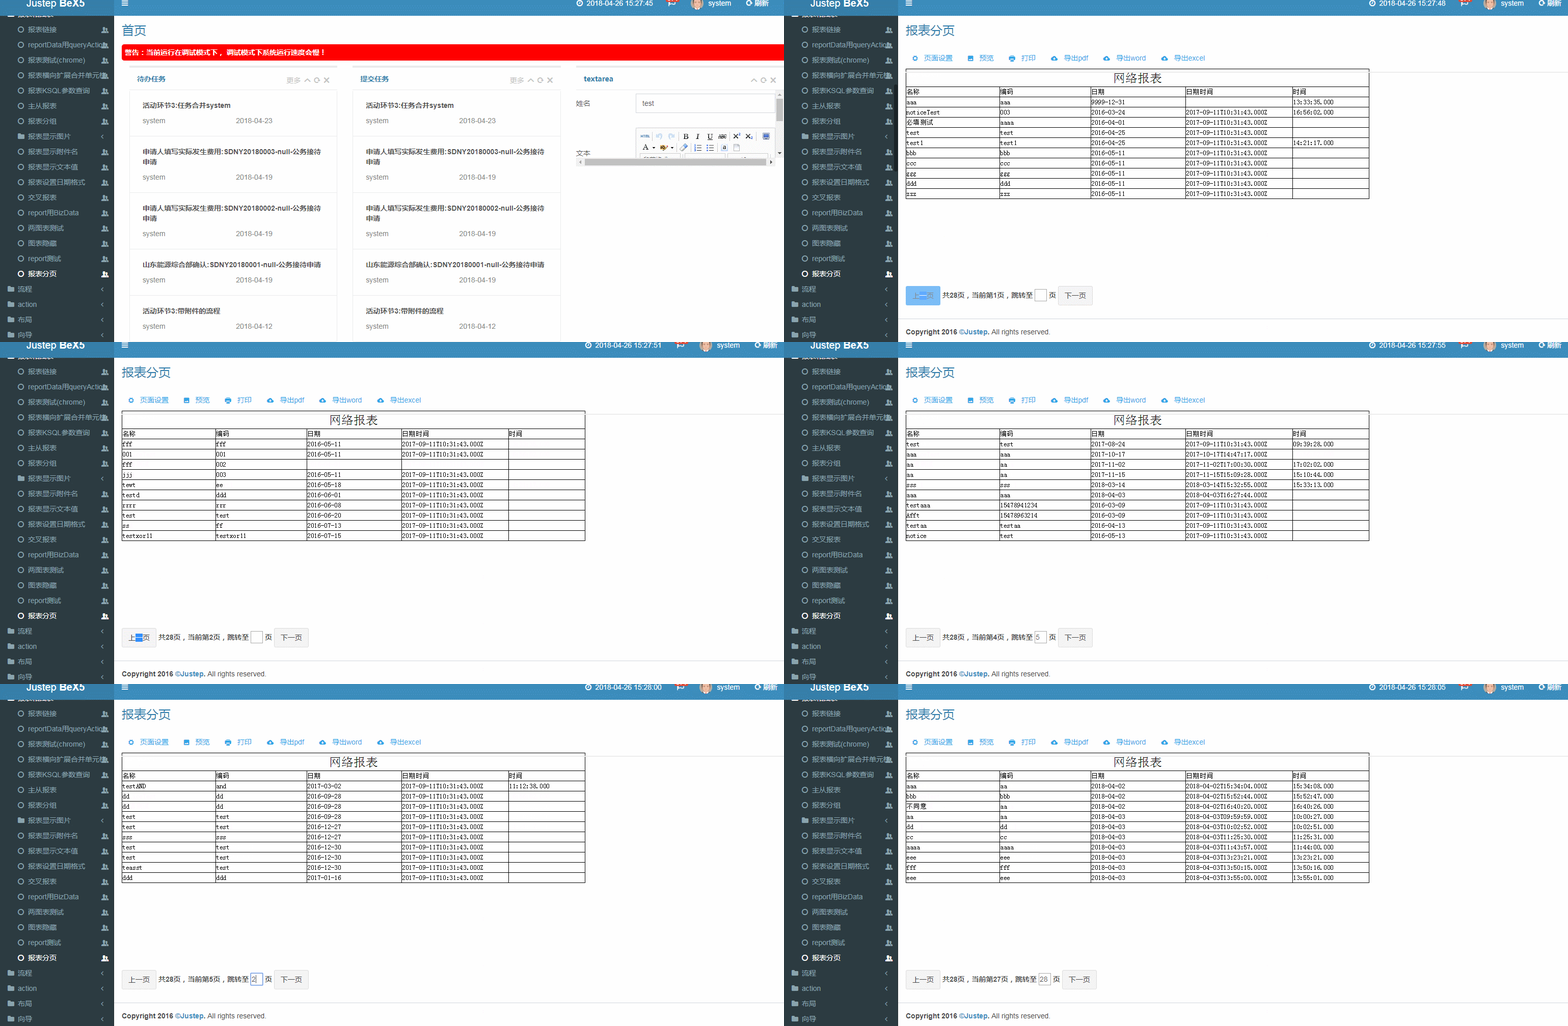
平台默认的报表分页设置record-per-page:每页显示几条记录批注是打印和导出PDF在可以起作用的
运行时默认是不会分页的,如果要显示分页需要自己实现分页的工具条,KSQL或者SQL中分页查询
本例是用KSQL实现的,定义了两个action,一个action是带参数分页查报表数据的,另一个action是查报表数据的总记录数
带参数分页查报表数据的action对应的java代码如下:
	public static Table reportPage(Integer offset){
		String ksql = "select rq.* from AP_RQ rq limit " + offset+",10";//KSQL中使用limit分页查询,每页取10条数据
		Table table = KSQL.select(ksql, null, "/appdemo/test/data", null);
		return table;
	}
查报表数据的总记录数的action对应的java代码如下:
	public static BigDecimal reportPageCount() {
		String ksql = "select count(rq) as cnt from AP_RQ rq";
		Table tCount = KSQL.select(ksql, null, "/appdemo/test/data", null);
		BigDecimal num = tCount.iterator().next().getDecimal("cnt");
		return num;
	}
.w中reportData关联带参数分页查报表数据的action,并且report的autoLoad设置为false
.w中放按钮实现上一页、下一页的操作,放html的label和input实现显示共多少页,当前第几页以及输入跳转,并且控制第一页时上一页按钮不可用,最后一页时下一页按钮不可用
如下:
      <a component="$UI/system/components/justep/button/button" class="btn btn-default"
        label="上一页" xid="button7" bind-disable="$model.page.get() == 1" onClick="button7Click">
        <i xid="i7"/>
        <span xid="span7">上一页</span>
      </a>
      <label xid="label1">label</label>
      <input type="text" value="" xid="input2" bind-keydown="input2Keydown" style="width:24px;"/>
      <label xid="label2"><![CDATA[页]]></label>
      <a component="$UI/system/components/justep/button/button" class="btn btn-default"
        label="下一页" xid="button8" bind-disable="$model.page.get()  == $model.pageCount.get()"
        onClick="button8Click">
        <i xid="i8"/>
        <span xid="span8">下一页</span>
      </a>
	var Model = function() {
		this.callParent();
		this.offset = 0;//表示从第几条开始取
		this.pageCount = justep.Bind.observable(0);//记录总页数
		this.page = justep.Bind.observable(1);//记录当前页数
	};
定义给reportData传参刷新report组件显示数据的方法reportRefresh:
	Model.prototype.reportRefresh = function() {
		var reportData = this.comp("reportData");
		var report = this.comp("report");
		reportData.setIntegerVar("offset", this.offset);//把从第几条开始取this.offset的值传给reportData的offset参数到后端分页查询数据
		report.refresh();
	};
model的onLoad事件中调用查报表数据的总记录数的action,并调用reportRefresh方法:
	Model.prototype.modelLoad = function(event) {
		var self = this;
		biz.Request.sendBizRequest({
			"context" : this.getContext(),
			"action" : "reportPageCountAction",
			"callback" : function(callbackData) {
				if (callbackData.state) {
					var count = callbackData.response;
					self.pageCount.set(Math.ceil(count / 10));//计算总页数,给this.pageCount赋值
					$(self.getElementByXid("label1")).html("共" + self.pageCount.get() + "页,当前第1页,跳转至");
					self.reportRefresh();

				} else
					alert("获取记录数失败");
			}
		});
	};
.w中默认没有bizData,调用action时的用的biz需要添加引用
var biz = require(“$UI/system/lib/biz”);
输入跳转的input的回车事件实现:
	Model.prototype.input2Keydown = function(event) {
		if (event.keyCode == 13) {
			var intPage = $(this.getElementByXid("input2")).val();//获取输入的值
			if (intPage > 0 && intPage <= this.pageCount.get()) {//判断输入值在1到总页数之间
				this.offset = (intPage - 1) * 10;//从第几条开始取this.offset赋值
				this.page.set(intPage);//当前页数this.page赋值
				$(this.getElementByXid("label1")).html("共" + this.pageCount.get() + "页,当前第" + intPage + "页,跳转至");
				this.reportRefresh();
			} else
				alert("请输入正确的页码");
		}
	};
上一页按钮的onClick实现如下:
	Model.prototype.button7Click = function(event) {
		this.page.set(this.page.get() - 1);//当前页数this.page赋值
		$(this.getElementByXid("label1")).html("共" + this.pageCount.get() + "页,当前第" + this.page.get() + "页,跳转至");
		this.offset = this.offset - 10;//从第几条开始取this.offset赋值
		this.reportRefresh();
	};
下一页按钮的onClick实现如下:
	Model.prototype.button8Click = function(event) {
		this.page.set(parseInt(this.page.get()) + 1);//当前页数this.page赋值
		$(this.getElementByXid("label1")).html("共" + this.pageCount.get() + "页,当前第" + this.page.get() + "页,跳转至");
		this.offset = this.offset + 10;//从第几条开始取this.offset赋值
		this.reportRefresh();
	};

评一波